VJ Loop Studio - User Guide
Overview
VJ Loop Studio lets you create dynamic visual effects using OpenGL shaders and export them as video loops. The software features:
- Real-time preview with playback controls
- Numerous customizable visual effects
- Color management with animation options
- Text and image overlay capabilities
- 3D object import and manipulation
- Effect parameter customization
- High-quality video export
Main Window Interface
The main window is divided into several sections:
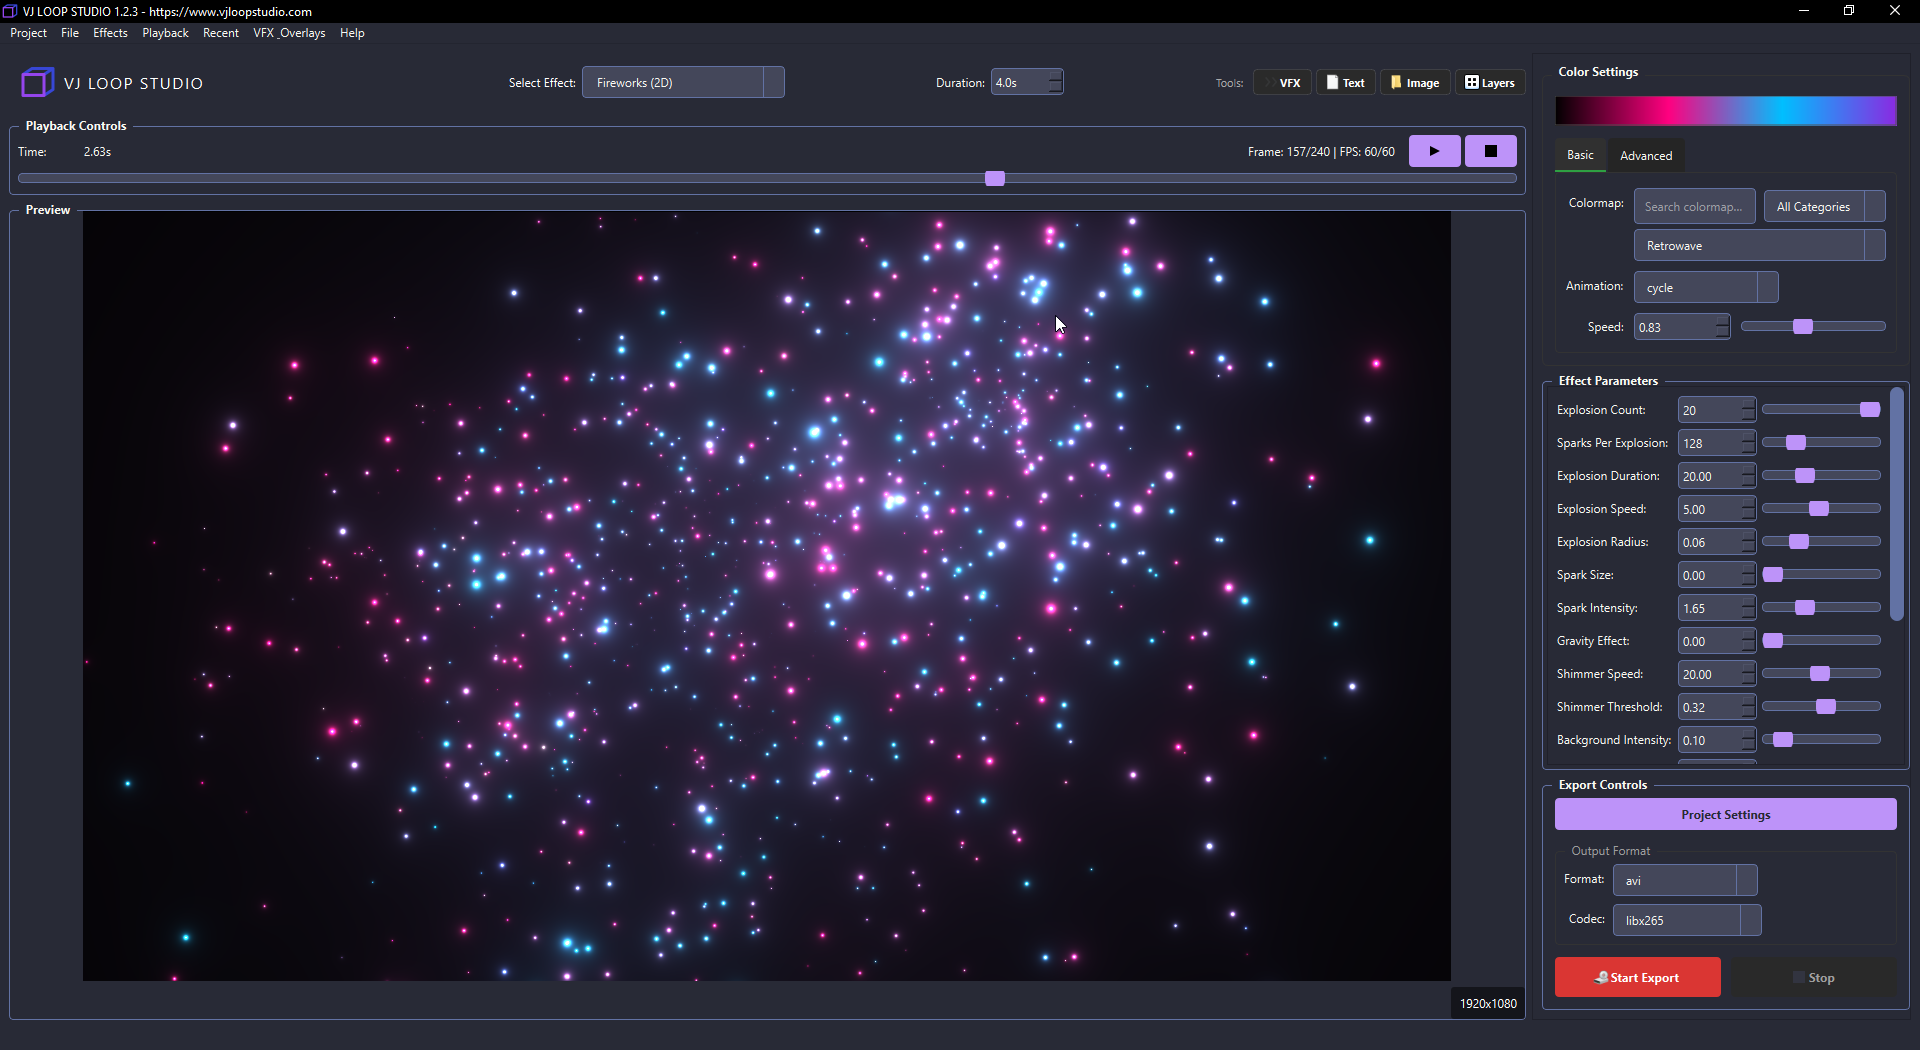
- Header bar - Contains the software title, effect selector, and tool buttons
- Playback controls - Play/pause, reset, and timeline controls
- Preview window - Real-time visualization of your effect
- Color settings - Colormap selection and animation controls
- Effect parameters - Adjustable parameters specific to the current effect
- Export controls - Video export options and controls
Project Settings
Project settings control the fundamental properties of your project:
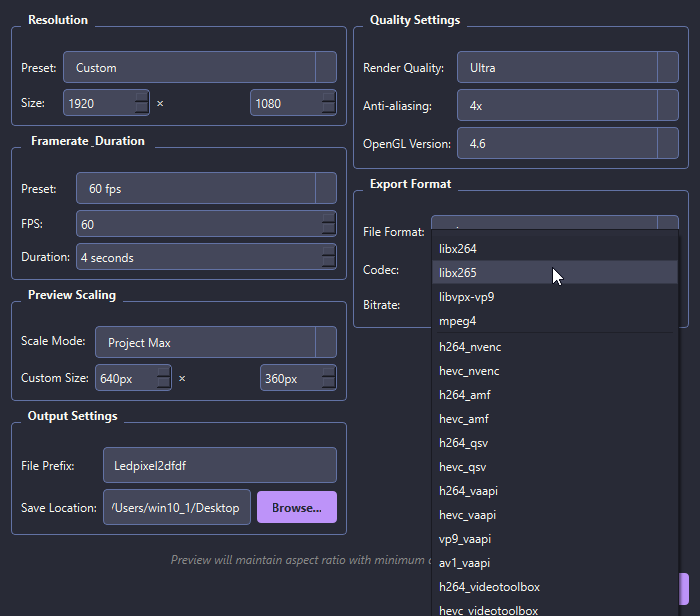
- Resolution - Set output dimensions (HD, Full HD, 4K, etc.)
- Framerate - Control frames per second (FPS) for playback and export
- Duration - Set the length of your animation loop
- Preview Scaling - Control how the preview appears in the interface
- Quality Settings - Adjust render quality and anti-aliasing
- OpenGL Version - Select compatibility version
- Export Format - Configure video output format and codec
Access project settings via File → Project Settings or by clicking the “Project Settings” button in the Export Controls panel.
Effect Selection and Management
VJ Loop Studio offers a wide range of visual effects, organized by categories:
- Use the dropdown menu to select effects
- Type in the dropdown to search for specific effects
- Effects are organized in the Effects menu by categories
- Recently used effects appear in the Recent menu
Each effect has its own set of parameters and behaviors. The effect name includes its dimension type (2D or 3D).
Playback Controls

- Play/Pause Button - Start or pause the animation
- Reset Button - Return to the beginning of the animation
- Timeline Slider - Scrub through the animation
- Time Display - Shows current position in seconds
- Frame Display - Shows current frame, total frames, and real-time FPS
The animation will loop automatically when it reaches the end, making it easy to preview how your loop will transition.
Color Settings
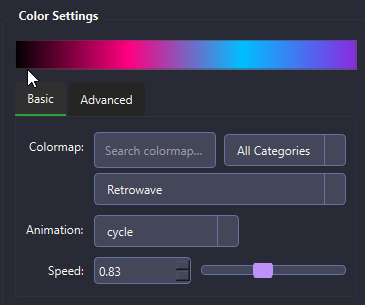
The Color Settings panel allows you to control the color scheme and animations:
Basic Tab
- Colormap - Select from various color schemes
- Search by name or filter by category
- Preview strip shows the current colormap
- Animation - Choose how colors change over time
- Options include cycle, pulse, bounce, static, etc.
- Speed - Control how fast colors animate
Advanced Tab
- Steps - Control color resolution (smoothness vs. distinct bands)
- Rotate - Shift hue across the entire colormap
- Custom Color Palette Editor - Create your own color schemes
For more detailed information on color management, see the Color Management Guide.
Effect Parameters

Each effect has its own set of customizable parameters that control its appearance and behavior. These may include:
- Sliders for numeric values
- Checkboxes for toggles
- Dropdown menus for options
- Color pickers
Parameters update in real-time as you adjust them, allowing you to see the impact of your changes immediately.
Export Controls
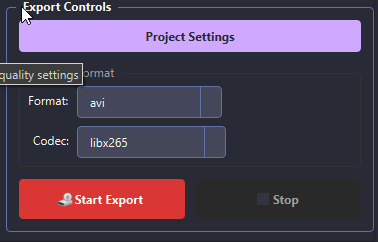
The Export Controls panel lets you configure and start video exports:
- Output Format - Select file format (MP4, MKV, AVI)
- Codec - Choose video codec (h.264, h.265, VP9, etc.)
- Export Button - Start rendering your animation to video
- Stop Button - Cancel an in-progress export
- Progress Bar - Shows export progress and estimated time remaining
When export completes, a dialog will appear with options to play the video, open the containing folder, or copy the file path.
Additional Features
VFX Effects

Access additional visual effects that can be applied on top of your base effect:
- Sparkles - Add particle effects
Access via Tools → VFX Effects or the VFX button in the header.
Text Overlay

Add custom text to your animations:
- Text Content - Enter your desired text
- Font Settings - Control font family, size, color, and style
- Position - Place text anywhere on screen
- Animations - Apply motion effects to text
- Advanced Options - Add shadows, strokes, and other effects
Access via Tools → Text Overlay or the Text button in the header.
Image Overlay

Add images, logos, or other visual elements to your animations:
- Image Selection - Choose an image file to display
- Position & Scale - Control placement and size
- Rotation - Rotate the image
- Opacity - Adjust transparency
- Animation - Apply motion effects
- Blend Modes - Control how the image blends with underlying content
- Color Filters - Apply color overlays
Access via Tools → Image Overlay or the Image button in the header.
Layer Order
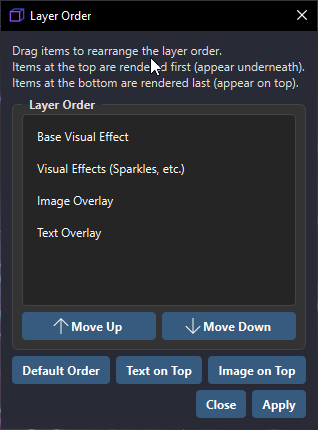
Control which elements appear on top of others:
- Drag and drop layers to reorder them
- Controls the stacking of base effect, VFX, text, and images
Access via Tools → Layer Order or the Layers button in the header.
3D Object Import
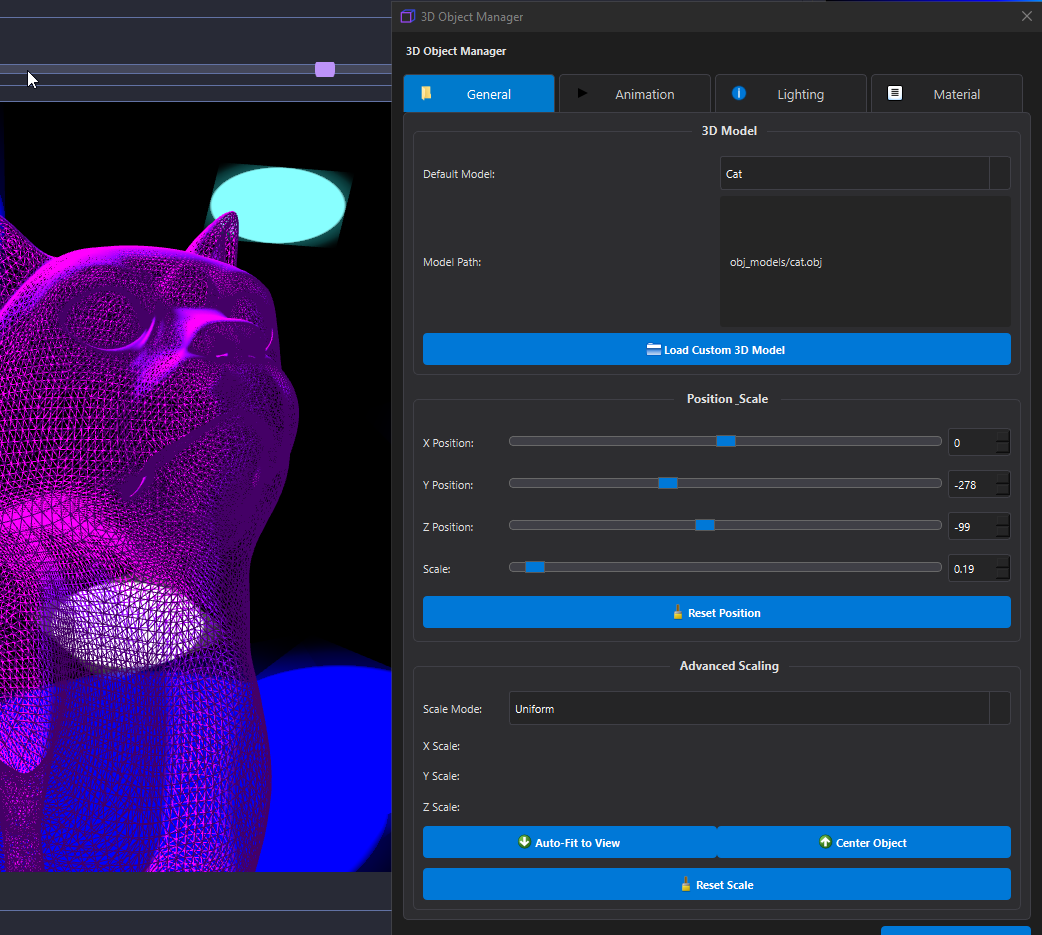
VJ Loop Studio supports importing and manipulating 3D objects to enhance your visual effects:
- Import Formats - Support for common 3D formats (OBJ, FBX, GLTF)
- Object Properties - Control position, rotation, and scale
- Material Settings - Adjust textures, colors, and shininess
- Animation - Apply motion effects to 3D objects
- Lighting - Configure lighting for 3D objects
- Camera Controls - Adjust viewing angle and perspective
- Blend Modes - Control how 3D objects interact with other elements
Access via Tools → 3D Object Import or the 3D button in the header.
Keyboard Shortcuts
| Shortcut | Action |
|---|---|
| Space | Play/Pause animation |
| R | Reset animation |
| Ctrl+R | Start recording |
| Ctrl+, | Open project settings |
| Ctrl+E | Open export folder |
| Ctrl+V | Open VFX window |
| Ctrl+T | Open text overlay window |
| Ctrl+I | Open image overlay window |
| Ctrl+L | Open layer order window |
| Ctrl+P | Open color palette editor |
| Ctrl+3 | Open 3D object window |
Tips and Best Practices
Preview Performance
If playback is slow, try:
- Reducing preview quality in project settings
- Lowering effect parameter values that cause high GPU usage
- Using “Project Max” preview scaling mode
Color Management
- Different colormaps create dramatically different moods
- Animation speed can be key to creating the right feel
- Custom colormaps allow for unique branding
Export Quality
- For quick drafts, use the “Draft” quality preset
- For final output, use “High” or “Ultra” quality
- H.264 provides the best compatibility across devices
- Use hardware acceleration codecs (NVENC, AMF, QSV) for faster encoding if your GPU supports them
Memory Optimization
- Close other GPU-intensive applications while using VJ Loop Studio
- Restart the application if performance degrades after creating many effects
Creative Techniques
- Layer text or images over effects for professional branding
- Use the mirror and grid VFX options to create kaleidoscopic effects
- Try different animation speeds to match your music or desired mood
- Experiment with animation duration for perfect loops
3D Object Tips
- Use low-poly models for better performance
- Experiment with different lighting setups for dramatic effects
- Combine 3D objects with shader effects for unique visuals
- Use camera animations to create dynamic perspectives
- Consider using normal maps for enhanced detail without high polygon counts